There are no products in your cart
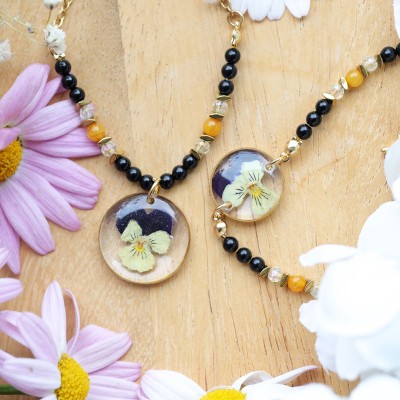

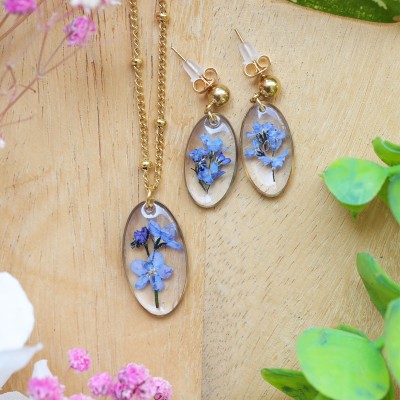
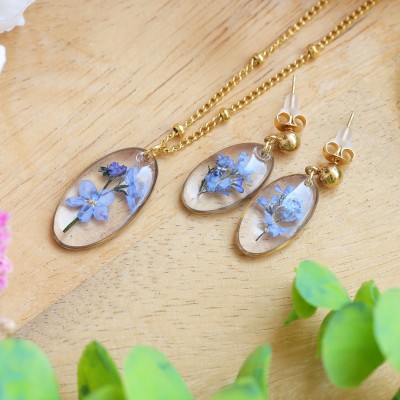
Pansy Jewelry Set
zł178.00
13.06.2025
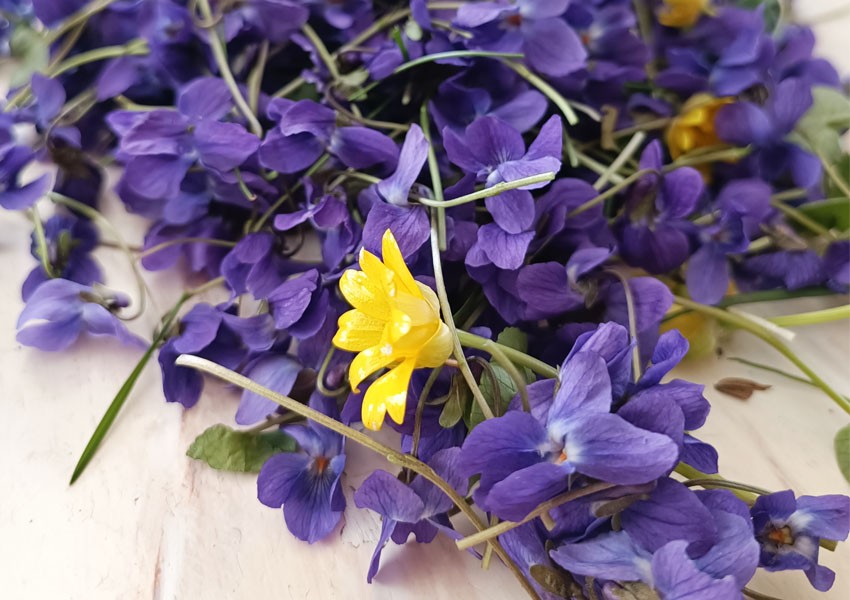
The first step is to properly harvest your flowers. It's best to pick flowers on a clear, dry day, preferably in the morning or late afternoon, when the dew has evaporated but the plants are not yet wilted by the sun. Avoid picking in or just after rain – damp flowers can easily mold during drying. The most beautiful specimens can be found in meadows, gardens, along forest paths, and even on your own balcony. However, remember to pick them with respect for nature – don't pick from protected areas or take too many from one location. Choose only healthy, undamaged plants that will still look good after drying.
The best and easiest flowers to dry are:
- Forget-me-nots,
- Roses,
- Gypsophila,
- Cornflower,
- Daisies,
- Pansies
- All kinds of green leaves, clover, ivy.
1. Dry flat in a book.
This is one of the oldest and simplest methods, involving pressing the flowers between the pages of a book or in a special press. This is the first method I tested.
When drying forget-me-nots, this is my most common drying method. I find hardcover books, place a regular paper towel, parchment paper, or cotton pads between the pages, and then arrange the flowers perfectly. It's important to remember that the arrangement of the flowers will determine how they dry, so it takes a lot of patience and time to arrange them correctly after the appropriate time.
Drying time: Depending on the flower, 2-4 weeks.
Pros: They are ideal for resin. A very easy, inexpensive, and simple drying method.
Cons: They can be very delicate and fragile; too long a drying time will cause the flowers to fade. Too much pressure will cause the flowers to fade, while too little will cause them to shrink and wrinkle. They can also yellow and rot very quickly. Very long drying time. Not suitable for all flowers (tulips, poppies, hydrangeas do not dry well).
IMPORTANT: Do not open the book during the entire drying period! This can cause the flowers to deform. They must be perfectly dry to be embedded in the resin.
2. Drying in semolina
This is the second method I tested for drying flowers. We need semolina, which we pour into a container or a box that can be sealed tightly. We pour the semolina into the container to cover the entire bottom. The next step is to arrange the flowers closely. Gently cover the flowers with semolina, ensuring they are completely covered. You can arrange a second layer of flowers, layer by layer. Then, seal the container tightly and set aside in a dark place.
Drying time: +/- 2 weeks.
Pros: The flowers dry almost perfectly, leaving a three-dimensional effect. This is a simple and inexpensive method. It can be used several times for drying.
Cons: They are not necessarily suitable for embedding in resin "flat" (unless you want to embed them in silicone molds). Bubbles may appear. The semolina often sticks to the flower and is difficult to remove. Bugs can become trapped in the semolina.
3. Drying in Cat Litter
Having two four-legged children, it was obvious to test this method. Is it possible? Yes! Do I recommend it? Not necessarily. The flowers can be distorted, wrinkled, and discolored. After drying, they are very fragile and can be easily damaged. This method didn't work for me. It's similar to drying with semolina. Pour the container into a container, arrange the flowers, cover with gravel, and seal. It's a good idea to find the finest silicone litter possible.
Drying time: 1-2 weeks
Pros: You can dry the flowers - a three-dimensional effect. A simple and relatively inexpensive way to dry flowers. It can work well for drying roses, hydrangeas, or daisies. Drying time is relatively quick.
Cons: A lot of patience is required when arranging the flowers. They can be very brittle and discolored. You need to find the finest silicone grit. It can stick to the flower during drying.
4. Drying with an iron.
Drying flowers with an iron is a quick and surprisingly effective method for fixing them, especially if you want a flat effect, similar to traditional drying in a book – but much faster. How do you do it?
Arrange the flowers on parchment paper (or baking paper) on top of a cotton T-shirt. Set the iron to medium power, without the steam setting. Once the iron heats up, gently press them onto the paper with the flower for about 10-15 seconds. Wait a moment to avoid overheating the flowers. Repeat several times until you achieve a dry and flat result. Leave the flowers between the sheets for a few minutes to cool. Carefully remove them – ready for further use (e.g., for jewelry, scrapbooking, or frames).
Drying time: 3-5 minutes
Pros: Very quick method (instead of weeks – a few minutes), immediate effect, ideal for thin petals and small plants.
Cons: Easy to burn or discolor the plant – it's worth trying.
Drying flowers is more than just a technique – it's a way to capture memories, emotions, and the beauty of nature. Whether you want to create jewelry, a decorative piece, or simply capture a moment, it's worth learning this art. And if you'd rather have someone else do it for you, check out my collection, where every arrangement is ready to delight your eyes and heart. I'd be happy to create jewelry from your wedding bouquet or a special occasion. I can immortalize the flowers that accompanied you on your special day in jewelry for years to come. You can also give such a keepsake to your loved ones, so they can remember these beautiful moments with you.
Related products